Project Description
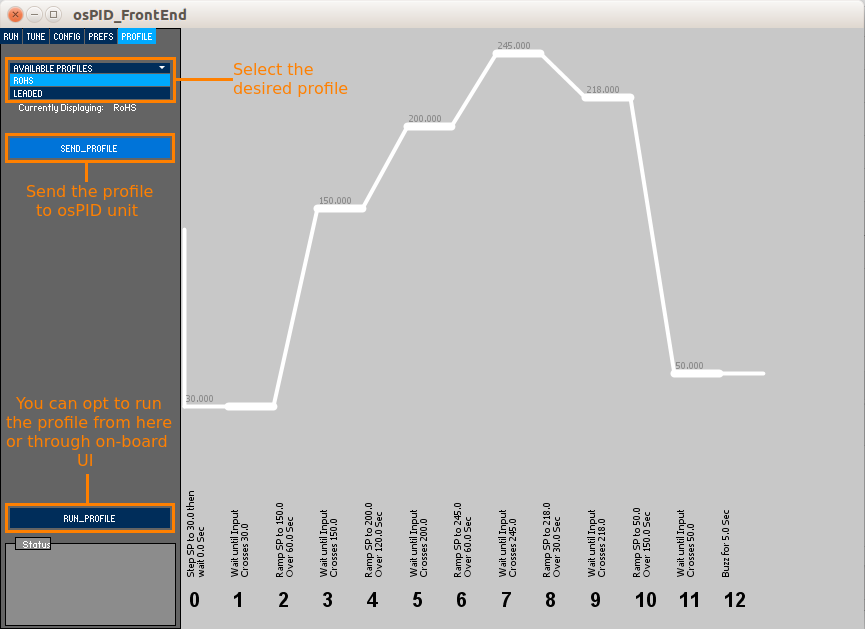
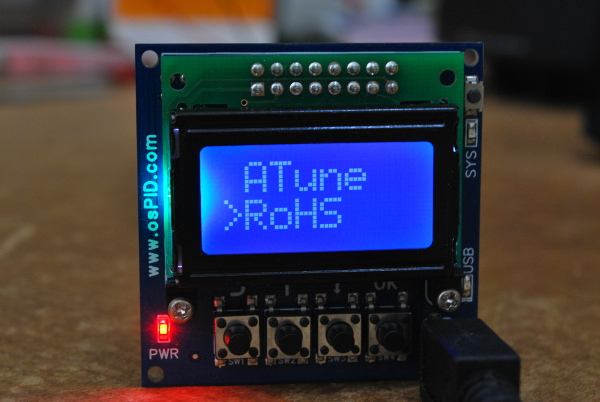
Profiles can be constructed using a simple human readable text file and send to the osPID unit to be stored on-board and run using the on-board user interface.
TYPE OF OPERATION, SETPOINT, DURATION
| Item | Description | |
|---|---|---|
| Type of operation | Ramp, 1 | Ramp towards setpoint within a specific duration. Ramp operation can be a negative or positive slope. The duration set will define the rate of increase/decrease. Ramp operation is specified using the value “1”. |
| Wait, 2 | Wait operation usually follows after a ramp operation. Wait operation is specified using the value “2” with zero duration. | |
| Step, 3 | An instantaneous increase or decrease of setpoint without any specific duration. Step operation is specified using the value “3” with zero duration. | |
| Setpoint | Desired value for the either a ramp or step operation. Setpoint must be set as zero for wait operation and buzzer usage. | |
| Duration | Duration in seconds for a specific operation. For ramp operation, this reflects the rate of the ramp process. For wait operation, it reflects how long it shall stay on the current setpoint. Duration must be set as zero for step operation, wait operation and buzzer usage. | |
| On-board buzzer | The on-board buzzer can be used as an indication of profile completion or anywhere within the profile. Buzzer usage is specified using the value “127” with a non-zero duration. | |
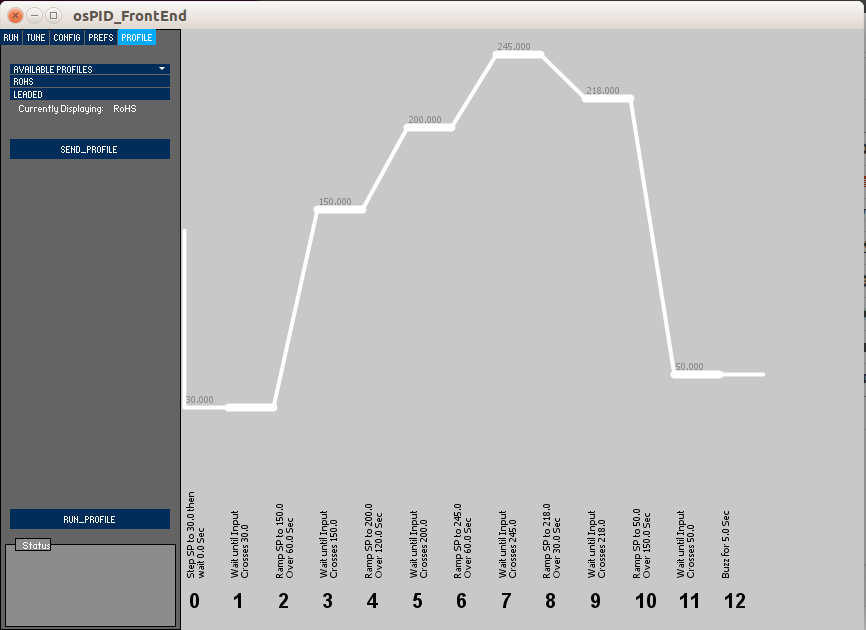
An example of a profile file:
RoHS //first row is Profile Name
3, 30, 0 //Step Setpoint to 30, wait 0 seconds
2, 0, 0 //Wait for PID Input to cross setpoint
1, 150, 60 //ramp setpoint to 150 over the course of 60 seconds
2, 0, 0 //Wait for PID Input to cross setpoint
1, 200, 120 //ramp setpoint to 200 over the course of 120 seconds
2, 0, 0 //Wait for PID Input to cross setpoint
1, 245, 60 //ramp setpoint to 245 over the course of 60 seconds
2, 0, 0 //Wait for PID Input to cross setpoint
1, 218, 30 //ramp setpoint to 218 over the course of 30 seconds
2, 0, 0 //Wait for PID Input to cross setpoint
1, 50, 150 //ramp setpoint to 50 over the course of 150 seconds
2, 0, 0 //Wait for PID Input to cross setpoint
127, 0, 5 //buzz for 5 seconds
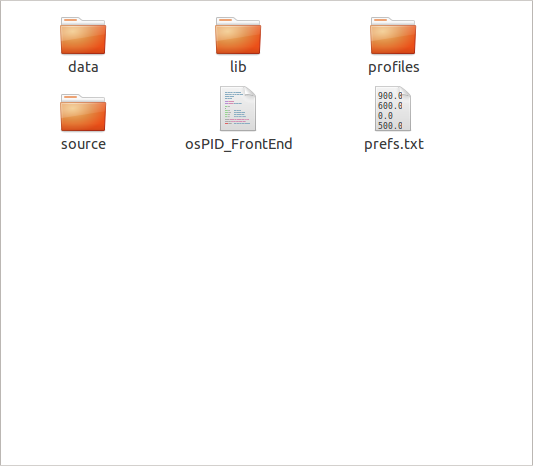
If you are running the precompiled version of the frontend, the profile files must be stored within the profile folder residing within the compiled frontend folder:
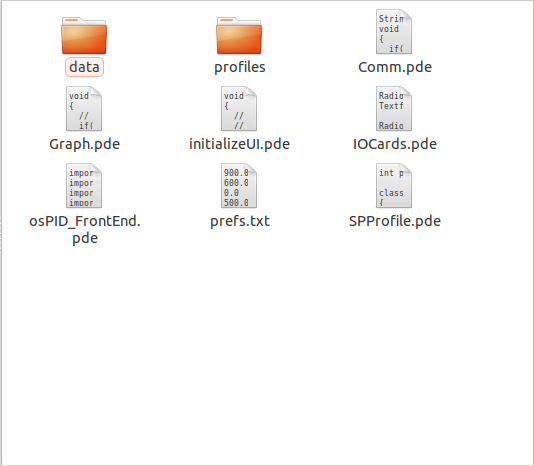
But, if you are running the frontend software through the Processing IDE (not compiled version), the profile files must be stored within the profile folder residing within the frontend software files folder:
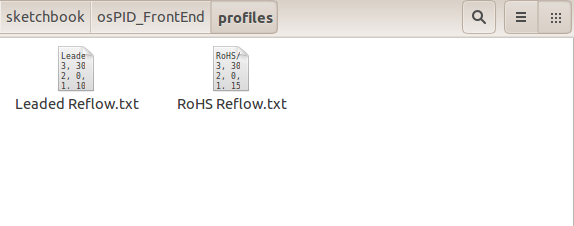
Within the profile folder, here’s an example how 2 different profiles are stored: